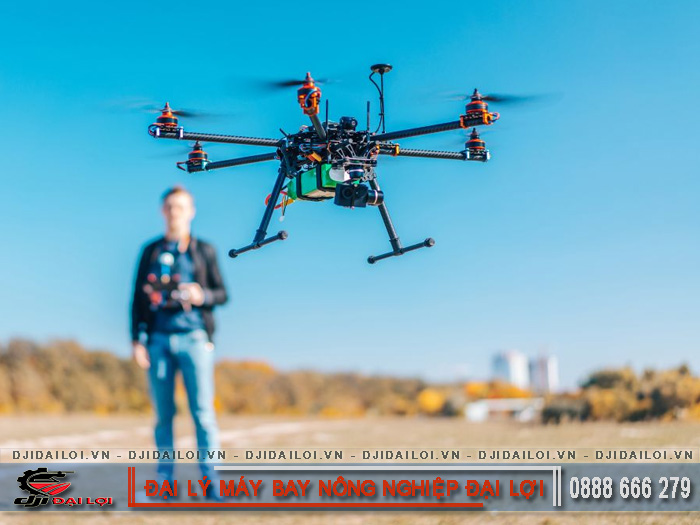
How to fix common agricultural drone errors

During agricultural drone operation, technical errors are inevitable. However, timely identification and repair can help protect your equipment, reduce costs, and maintain farming efficiency. This article provides clear, step-by-step instructions to troubleshoot common drone issues directly in the field.

Cách sửa lỗi máy bay không người lái trong nông nghiệp hay gặp

Reasons to fix agricultural drone errors promptly

When operating an agricultural drone, many users focus mainly on spraying, seeding, or crop monitoring efficiency while ignoring warning signals. However, delaying detection and repair not only causes financial loss but can also interrupt the entire farming cycle.

Here are the main consequences of failing to fix drone errors in time:

  • Interrupted spraying or seeding process: Mid-flight malfunctions cause uneven spraying, reducing crop protection efficiency.
  • Increased repair costs: Small issues, if ignored, can escalate into system-wide failures-doubling repair expenses for motors, sensors, or propellers.
  • Crop damage: Misaligned flight paths or wrong spraying amounts can cause plant death or chemical residue accumulation.
  • Flight safety risks: Unresolved GPS, balance, or obstacle sensor issues can lead to crashes, damaging equipment or endangering people nearby.
  • Warranty denial: Many manufacturers reject warranty claims if damage stems from misuse or lack of maintenance.

Detecting and fixing errors early helps maintain drone performance, ensure safety, and protect profitability throughout the farming season.

What to prepare before troubleshooting

Fixing an agricultural drone requires proper knowledge, tools, and testing conditions. Unprepared repairs may worsen the issue.

1. Basic drone knowledge

  • Understand UAV operation principles (motor, battery, GPS, spraying system).
  • Know how to read error codes and warnings in control apps.
  • Be familiar with automation, flight path programming, and device limitations.

2. Technical tools

  • Precision screwdriver set for small electronics.
  • Voltage/current meter.
  • Flight log reader or connected app for error data.
  • Spare propellers, sensors, and anti-vibration screws.

3. Software and support tools

  • Official diagnostic apps such as DJI Agriculture or XAG Agri App.
  • Latest firmware updates.
  • Stable internet connection for downloading patches or manuals.

4. Safe testing environment

  • Flat, open area without strong winds.
  • Sheltered workspace to prevent rain or sunlight damage.
  • No GPS or radio interference (avoid near BTS towers or military zones).

5. Technical documents and access

  • Manufacturer’s technical manuals.
  • Maintenance access codes (if protected).
  • Admin or technician account for system-level diagnostics.

Proper preparation ensures safe, efficient troubleshooting without causing new errors.

Step-by-step guide to fixing agricultural drone errors

Not every agricultural drone problem requires professional service. Many common issues can be fixed on-site using a systematic approach.

Step 1 – Check power supply and batteries

Ensure the battery is fully charged, not swollen, leaking, or dropping voltage abnormally. Use a voltmeter to measure each LiPo cell (>3.7 V/cell recommended).

→ Always rely on instruments, not just app indicators, which may misreport due to faulty sensors.

Step 2 – Read error logs in the control app

Most drones (e.g., DJI, XAG, Yanmar) show errors via app or LED patterns. Connect to the official app and check “Flight Records” or “Error Logs.”

→ Each code has meaning: ESC (speed controller), IMU (balance), GPS loss, etc. Never continue flying before identifying the cause.

Step 3 – Inspect and replace propellers

Damaged or bent propellers cause imbalance or flight drift. Remove and test each on a flat surface. Replace with model-specific propellers only.

→ Never use off-brand blades-they can damage motors.

Step 4 – Recalibrate IMU and compass

If the drone drifts or spins, IMU or compass calibration may be off. Open “Sensor Calibration” in the app and recalibrate on a flat, metal-free surface.

→ Avoid areas with magnetic interference (vehicles, workshops, power stations).

Step 5 – Update firmware and reset system

Software bugs often cause errors. Update to the latest firmware or perform a factory reset.

→ Review the firmware changelog before updating to prevent hardware incompatibility.

Step 6 – Check spraying system (if equipped)

If the pump or nozzles malfunction, inspect flow sensors and hoses. Manually test each part via the app to locate blockages or defects.

→ Avoid washing with high-pressure water-this can damage seals or electronics.

Step 7 – Perform a short test flight

After repairs, test-fly at low altitude in an open space. Check motor sound, vibration, and hover stability. Proceed only when all systems perform normally.

Common mistakes and risks when repairing agricultural drones

Even with guides, users often make costly mistakes:

  • Disassembling boards without anti-static tools, damaging chips.
  • Using incorrect or reversed battery wiring, causing short circuits or fires.
  • Mounting propellers in the wrong order, leading to flip-overs.
  • Calibrating the compass indoors near metal objects, causing outdoor navigation failure.
  • Forgetting to reset after part replacement, creating sensor conflicts.
  • Updating firmware with low battery, causing freeze or signal loss.
  • Cleaning with direct water spray, short-circuiting control boards.

If uncertain, contact an experienced agricultural drone service center-especially for GPS, IMU, or software-related errors.

Signs of successful repair

After fixing, confirm stability before resuming operations. Key signs include:

  • Smooth startup, no warnings: Drone powers on quietly without app error codes.
  • Stable hover: Maintains position at 1–2 m height without drift or shaking.
  • Consistent spraying performance: Even flow, no leaks, and steady pressure.
  • Accurate control response: Obeys direction commands, smooth takeoff and landing.
  • App shows “Ready to Fly”: All systems meet safety standards.
  • Normal flight duration: Battery lasts as specified (e.g., 15–18 min continuous).

If no errors recur after 2–3 short test flights (<10 min each), the drone is ready for field work.

Cách sửa lỗi máy bay không người lái trong nông nghiệp hay gặp

Choosing the right agricultural drone

Many operation errors originate from poor equipment choice. Select the right agricultural drone model based on farming scale, terrain, and user experience.

Farm size

Recommended models

< 3 ha

DJI Agras T10, XAG V40 Mini

3–10 ha

DJI T20P, XAG P40

> 10 ha

DJI T40, XAG V100, Yanmar YR2

By crop type:

  • Low crops (rice, vegetables): Choose radar-guided terrain-following drones.
  • Tree crops (mango, rubber): Use high-power multi-angle spray models.

By terrain:

  • Flat fields: Standard GPS models are sufficient.
  • Hilly terrain: Require radar altitude tracking and obstacle sensors.

By skill level:

  • Beginners: DJI Agras T10/T20P for simple maintenance.
  • Professionals: XAG V40/V100 with AI flight programming.

By budget:

Price range

Typical models

< 100 million VND

Local drones, DJI T10 Lite

100–200 million VND

DJI T20P, DJI T25P

> 200 million VND

DJI T40, T50, T70P, T100

Always verify after-sales service, spare-part availability, app compatibility, and firmware support before purchasing.

Mastering agricultural drone troubleshooting not only reduces maintenance costs but also ensures safe, uninterrupted farming. Equip yourself with the right knowledge, tools, and regular diagnostics to keep your drone in optimal condition. Choosing a suitable model from the start minimizes future errors and maximizes return on investment.

Frequently asked questions

How to distinguish between software and hardware errors on agricultural drones?

Software errors appear as alerts in the control app; hardware faults cause abnormal noise, vibration, or startup failure.

Can I fix GPS positioning errors myself?

Yes. Recalibrate the compass, update to the latest firmware, and test in an open, interference-free area.

My drone shows an ESC (speed controller) error. Do I need to replace it?

Not always. Check wiring, propellers, and load first. Replace only if the ESC remains faulty afterward.

When should I recalibrate the IMU sensor?

Whenever the drone drifts, loses altitude stability, or displays “IMU Error” in the control app.

Can I use a battery from another model?

No. Each drone requires its own battery type. Using an incompatible one can cause fire or controller damage.

When should I update my drone’s firmware?

Update firmware if you encounter recurring software issues, unstable flight, or when the manufacturer releases security or feature updates.